Introduction
Controlling multiple LEDs with Arduino is a great way for beginners to learn about digital outputs, basic programming, and timing sequences. In this project, we will create a simple traffic light simulation using three LEDs to represent the red, yellow, and green lights.
What You Will Need
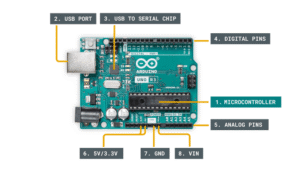
- Arduino Uno board
- Breadboard
- Jumper wires
- 3 LEDs (Red, Yellow, Green)
- 3 Resistors (220 ohms each)
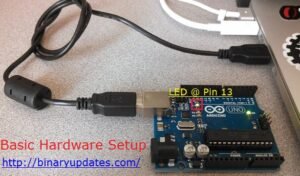
- USB cable for connection
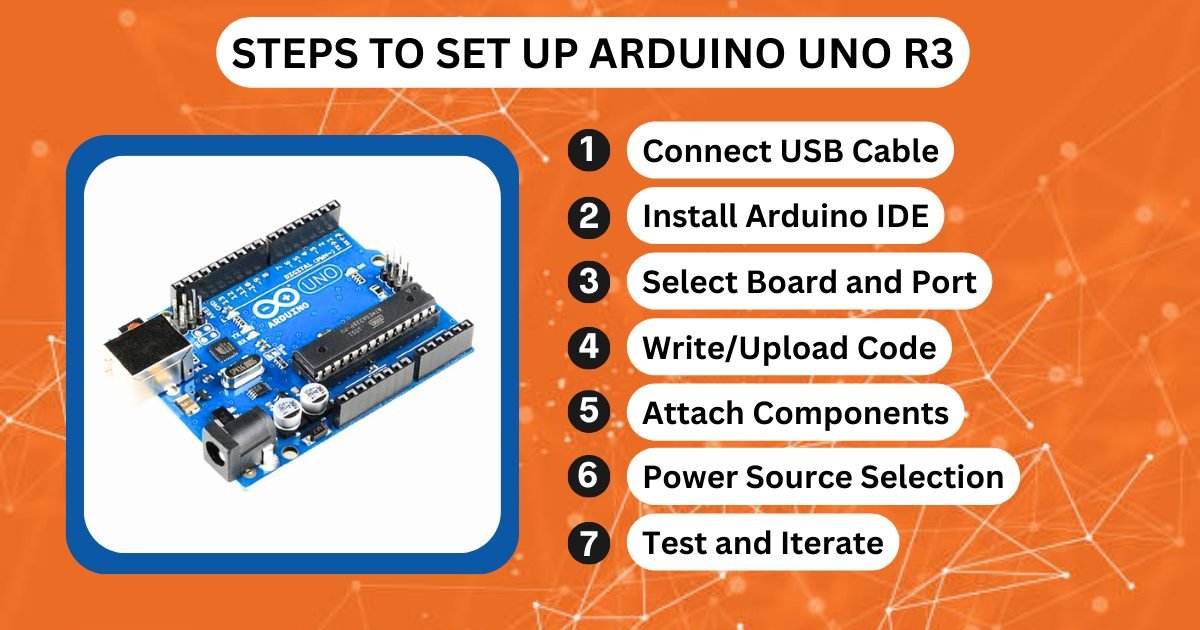
Setting Up the Hardware
- Insert the red, yellow, and green LEDs into the breadboard.
- Connect a 220-ohm resistor to the anode (longer leg) of each LED.
- Connect the other end of each resistor to a digital pin on the Arduino:
- Red LED to Pin 8
- Yellow LED to Pin 7
- Green LED to Pin 6
- Connect the cathodes (shorter legs) of the LEDs to the GND rail on the breadboard.
- Connect the GND rail of the breadboard to one of the GND pins on the Arduino.
Writing the Code
Open the Arduino IDE and write the following code:
cppCopyEditvoid setup() {
  pinMode(8, OUTPUT); // Red LED
  pinMode(7, OUTPUT); // Yellow LED
  pinMode(6, OUTPUT); // Green LED
}

void loop() {
  // Green light ON for 5 seconds
  digitalWrite(6, HIGH);
  digitalWrite(7, LOW);
  digitalWrite(8, LOW);
  delay(5000);

  // Yellow light ON for 2 seconds
  digitalWrite(6, LOW);
  digitalWrite(7, HIGH);
  digitalWrite(8, LOW);
  delay(2000);

  // Red light ON for 5 seconds
  digitalWrite(6, LOW);
  digitalWrite(7, LOW);
  digitalWrite(8, HIGH);
  delay(5000);
}
How the Code Works
setup(): This function runs once when the Arduino is powered on. It sets the LED pins as outputs.
- loop(): This function runs repeatedly. It first turns the green LED on for 5 seconds, then the yellow LED for 2 seconds, and finally the red LED for 5 seconds. This sequence mimics the operation of a real traffic light.
- digitalWrite(): This command sets a specific pin to either HIGH (on) or LOW (off).
- delay(): This function pauses the program for a set amount of milliseconds (1000 milliseconds = 1 second).
Conclusion
This simple traffic light simulation introduces you to working with multiple digital outputs and timing delays in Arduino programming. It is a great stepping stone toward creating more complex projects involving sensors, motors, and other actuators. Once comfortable, you can expand this project by adding buttons to simulate pedestrian crossings or sensors for real-world interactions.